Photo by Unsplash

If you’ve been creating content for virtual meetings and events this year, then you know that you need to maximize the impact and longevity of your content, even after the meeting. In this blog post, I’ll talk about how to plan engaging content that helps you maximize impact, amp up your next virtual or live event, and ensures audiences engage with your brand even after your event is over.

  1. Ensure Video Content Fits into a (Virtual) Event Story Arc

So many times we create content for the wrong reasons. Maybe “Cherie needs to be in the video” because she’s an important stakeholder in the organization. Or a particular sponsor needs to be featured. But how do you connect these stories to the story you are telling in your event? Each event needs its own story arc, a narrative that you want attendees to come away with once the video cameras are off. So as you build your virtual content, ask these questions:

How do the various videos we want to share fit into our overall story?

Is there a way we can make them fit better?

Can we break longer videos up into smaller portions –“snackables” — to tell our story on social before and after our event?

It’s important to map that out, and find appropriate places for different narratives that feed into your larger story.  If something doesn’t fit, you might need to find an alternative. For example, often sponsors have multiple videos they’ve created about their products or services. Perhaps one fits better than others with your target attendees. Sometimes I’ve even been able to get sponsors to create a more customized version just for us. This way, attendees don’t feel like that content doesn’t fit with our bigger story. And anyone viewing your event afterwards online will also find a cohesive message.

  1. Engage Audiences as Communities Post-Event

Sometimes you need to deliver different content to different communities in different ways. That means planning ahead to create multiple versions of some videos you want to feature at your event. For example, you might share a 1-minute version of a member story for an association event, but then post-event, share the full 4-minute video. And post-event, what opportunities are you offering participants to engage with one another to share the impact and continue important conversations? Perhaps you create an event alumni Facebook group. Or invite attendees to join a monthly Zoom chat which you can kick off with a new impact story, to jumpstart the conversation. Or perhaps you want to engage your community post-event in some important policy action through an email campaign that contains links to several different content strands. Audience members are people, and your event is just one touch point to build a sense of shared purpose and continued connection.

  1. File Formats Best Practices for Video

If you are producing a hybrid or virtual event, you’ll likely have a number of different content elements to bring into your delivery platform, then share again afterwards. Most platforms are still only streaming at fairly low bandwidth depending on your subscription level, so don’t overwhelm the system by trying to play back 4K video. You could end up with audio out of sync and heavy digital drag.  If you have high resolution assets, make lower resolution compressions and test them in advance on your platform. Typically, 1080p mp4 files compressed for Vimeo or YouTube spec will play back just fine.

If you have speakers who will be sharing videos, be sure they play back these sources natively from their presentation computer (and whoever is hosting that session should also have a backup copy on their desktop.)  And don’t wait until your event to find out how they will look. Have speakers who want to share videos practice sharing in a test session. I recently attended a virtual concert where the speaker tried to play back a performance from her YouTube channel, which caused a lot of unnecessary lag and choppiness. She could have shared the source file with no problems directly from her desktop. And be sure any video content you want to play back through your event platform—such as sponsor videos, intro videos, or highlights—are also tested through the platform. You can always share higher resolution versions through your website, YouTube channel or Vimeo channel post-event.


Amy DeLouise is a producer/writer/director specializing in branded content for virtual and live events.

Socially distanced panelists filmed in studio for a virtual event feed – courtesy Interface Media Group 

As part of my continuing series on producing virtual events,  I caught up with Steven Yerman, Vice President of Operations, and Nick Mueller, Studio Manager at Interface Media Group in Washington, D.C. [Full transparency—I’ve hired IMG for their great studios, and they’ve hired me to produce virtual event content.]

Amy: What are some of the pitfalls of planning virtual events?

Steve: Even more planning goes into virtual events than live events.  Typically, a live awards event might take 6 months of planning, but the same group will only allot a few weeks to the same event happening virtually. And yet there are so many more technical components.

What takes the most time in pre-production to make sure the event succeeds?

Nick: Running technical tests takes time – you want that time with all of your “talent” to be sure their connections work right, video and audio look and sound good.

What are audiences expecting, now that we’ve had almost a year to develop virtual content?

Steve: The audience is expecting more than a Zoom meeting.

Nick: You don’t want to have a talking head for 60 minutes. People want dynamic content.

Steve:  You need to think of these events as television productions. The audience wants content that looks tight, like a real broadcast, with higher quality video and graphics.

So how are you taking the risk out of creating that kind of “broadcast look”, especially when most of the people speaking are not on-camera professionals?

Steve: Often we pre-record key segments. Let’s say it’s an awards event. We’ll mail the person the award in advance. We then record them saying their remarks. We’ll edit that nicely, with lower thirds and logo graphics, then bring it into the live event.

There are loads of different platforms for bringing an audience into a virtual event—Zoom, WebEx, Skype, Bizzabo, Hopin, Aventri, etc. (I will cover these in another post). What unique tools do you bring as a broadcast studio?

Nick: We can use Talk Show VS4000 which allows us to bring in four guests via Skype.

That’s a multi-channel video calling system designed to simultaneously connect you with up to 4 remote sources and give you full audio and video control over the signal and what happens next.

Nick: Correct. So this is a great tool for a talk-show type format.  We also use the Tricaster.

You’re talking about the broadcast switcher?

Nick: Right. It can take a signal and push it to YouTube, Facebook, a website, or an external encoder. It will work with Zoom, WebEx, Teams or Skype and can also ISO record audio and video. And it can handle mixed format inputs.

Just to clarify for our readers, ISO means “isolated” audio or video signal—meaning, a separate record that doesn’t mix in the other speakers and visuals.

Nick: Yes. So we have those “clean” sources if we need them to tweak a session after it has been recorded live.

That’s incredibly handy, because mistakes happen and we don’t want the permanent recording to contain any! So how do you bring the client into the picture, so to speak?

Steve: We’ve been using a conference bridge for the client and tech team, so we can communicate offline and not interfere with what is being recorded.

What’s the biggest challenge that gets overlooked when planning for a virtual event that is bringing different speakers and panels to the audience?

Steve: You need to think about the maximum number of feeds and what you will show during the transitions. Another one of the challenges to space out the show correctly to have the pauses to make those technical transitions.

That’s where a show writer like me comes in handy. Just like I do for a live event, I write what’s called a showflow that anticipates those transitions, so we have every segment timed out and also have video content ready to fill any gaps, like prep time for speakers.

Steve: Exactly. You need your speakers on the line 15 minutes to a half hour before they go live, and we keep the connection open while they get ready.

Nick: Because if you wait until 5 minutes before hand and you have technical issues with their connection, you have no time to fix it.

How are you mixing virtual and live, in-studio feeds?

Steve: We’ll often have an on-air “talent” hosting the event from one of our studios, and then we’ll have panelists in the other studio and also coming in remotely from multiple locations. Plus roll-in videos and Skypes from earlier in the day.

And does that work?

Nick: We make it work. The only problem we had once was a guy in his car in a parking lot. He really didn’t have the best connection so I had to go to a different guest.

Steve: But we plan for that. We have a photo of each guest and a name slate ready to go in case we need to switch to audio-only.

What you’re describing is a lot like television, but also it isn’t.

Steve: Yes, guests (panelists) need to understand that once you get going there is no stopping the train. We can’t drop out and go to commercial break.

It’s been an interesting ride so far. What’s next?

Nick: I really see [remote and in-studio production] staying even if we “get back to normal” because of significant cost savings like hotel and travel.

Steve: I think people will still want to get together and give awards in person and see each other face to face. But you’ll see more panel discussions with a remote interview added into the panel. And folks will still want to produce segments in the studio where you have a controlled environment, good branding, and a good looking set. But virtual opens a whole new world to engage people from anywhere in the world.


In an episode of The Dick Van Dyke Show (“Boy #1, Boy #2,” CBS, 1965) Rob casts their son and one of his friends in an episode of his TV show. The results aren’t as anticipated. He confesses to the two moms: “Those kids can’t act, they’re terrible…When they started out they were almost fair, but the more they rehearsed the worse they got!” When the moms remind him the kids aren’t professionals, he responds “Yeah, because professionals get better!” So true. One of the big differences between trained and untrained talent is that repetition and self-consciousness about being in front of cameras and crew often degrades rather than enhances their “performance.”  And each time you make your reality player self-conscious about the camera, chances are high they will be less natural—the very reason you wanted them in the first place. This, in turn, can radically affect your schedule and budget.  In other chapters, we address specific techniques for re-introducing a question during an interview, for blocking a re-enactment, or getting that scene from another angle for a documentary, all without making your subject feel awkward.  To keep your production schedule and budget on target, you need all the help you can get to minimize retakes and set-ups. Even if you are masterful at keeping your subject from feeling pressure during the shoot, every minute you spend in shoot planning will be paid back in decreased time and costs on the post-production side.  Since you never entirely know how a “real person” will react to being on camera, the following are some strategies you can use to minimize unpleasant surprises and budget-busting problems, while you maximize creative opportunities.

  1. Be sure you discuss options for on-camera clothing before the shoot. Bring extra ties on set. If green-screen, be sure your subject is not wearing any green!
  2. Have enough crew. A production assistant is worth their weight in gold to help move gear in place quickly, or handle the back-end of recording remotely. Non-actors are not used to the “hurry up and wait” pattern of production life.
  3. Give non-actors a break by shooting b-roll.  I often shoot a little bit of b-roll to warm them up to the crew, before sitting the person down for an interview.
  4. Use Locations Familiar to Subject to help them be more comfortable. If you need to move objects around for a better background, ask permission. (You may need to have the person themselves move things around for remote interviews.)

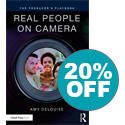
Excerpted from my book “The Producer’s Playbook: Real People on Camera”.  I love directing “real people” on camera. Please sign up for my additional tips ——–> see sidebar!


Remote feeds during the #GALSNGEAR Tech Talks segment that I produced and hosted from my virtual office in DC, with switching and production took place from Broadcast Beat’s studios in Florida, during NAB Show Express online conference.

If you’re confused by all the many tools of virtual event and content video production, you’re not alone. Here, I will set out to briefly demystify some of the different components and tools for creating, encoding and distributing content remotely.

Virtual livestreaming and switching platforms

Zoom, WebEx, Skype are some of the livestreaming platforms we are all familiar with by now, so I won’t go into their features. Manycam is another dedicated streaming tool useful for those teaching remote classes, for example. ManyCam allows you to stream live videos on YouTube and Facebook simultaneously, and includes a mobile app for Android and iPhone. As this useful review explains:  “This program acts as a middleman between your webcam and whatever application you want to connect it to. It could be Facebook Live, Twitch Livestream, a Skype video call, and much more.” Streamyard is a newer player, recently acquired by Hopin, and a bit more sophisticated. It allows the user to add subtitles, put links on the screen live, and engage guests using a robust chat feature. And you can use it to stream your video content directly to Facebook, YouTube, LinkedIn, and other platforms.

Virtual event management platforms

Managing a virtual event requires much more than the live streaming/switching function. You need a way to track tickets and users, provide captioning and translations, build out spaces for sponsors and more. Some event organizers have cobbled together solutions by combining tools like Eventbrite for ticketing and tracking audiences with the services of Rev.com for live-captioning on Zoom.  Socio, Bizzabo, Hopin, and Aventri are some of the players who offer integrated event management elements with ticketing, tracking, metrics, translations, post-event content storage, and more.  For example, Socio provides a way to segment your audience for access to different sessions and push notifications, interactive mingling areas, and a sponsor hub.

Mootup has intrigued me for some time.  They’ve put the focus on creating a VR like experience without a need for headsets. The platform offers a gamified experience where each participant selects an avatar that can move through conference spaces such as an auditorium for presentations, breakout rooms like the firepit, virtual tradeshow floors and more. And it integrates with Zoom, so speakers can present from the traditional Zoom app directly to the 3D audience.

Pro tools for switching and encoding multi-source content for streaming

If your organization is building in-house production and streaming capabilities, or producing an event that requires a broadcast approach to multiple feeds, then you have many tools to choose from.

Blackmagic Design offers a great series of affordable professional production switchers, as well as the bargain-priced ATEM Mini and ATEM Mini Pro for smaller setups with fewer sources. (I use the ATEM mini when I present, so that I do not have to rely on the “screen share” functions of Zoom or other platforms.)

On the higher end, Talk Show VS4000 is a multi-channel video calling system designed to simultaneously connect you with up to 4 remote sources and give you full audio and video control over the signal and what happens next.

A Tricaster has long been the standard for in-studio switching, and can take a signal and push it to YouTube, Facebook, a website, or an external encoder. It will work with Zoom, WebEx, Teams or Skype. The Tricaster can also ISO record audio and video, and has the ability to handle mixed format inputs.

Video encoding systems such as Teradek can save you bandwidth if you are encoding a large amount of content for streaming to an online platform like Youtube, Twitch, or Facebook. A Teradek encoder can also be used on set so that a remote producer or interviewer can monitor the live video feed on an iOS device for confidence or directing local configuration.

This is just a brief overview of the tools we use as live and virtual event and content creators. I hope it’s helpful as you navigate our new world of virtual and hybrid event production. Please reach out to me if I can help you with any remote, live or hybrid content creation this year.

Amy DeLouise is a virtual and live multi-platform content producer. She’ll be speaking this week at the Remote Production Conference. Use this link for 10% off your registration!


Virtual events and interviews are here to stay. And if you’re tapped to conduct an interview remotely, you’ve got a big task ahead of you. Prepping to host a virtual webinar or remote interview has some similarities with doing it live, but also some major challenges and differences. I’ll share a few common obstacles and how to solve them in this article.

  1. Curation is Key. One of the keys to a successful remote interview or panel is being sure you have the right person for that conversation. Just because someone is a subject matter expert, for example, does not make them a great interview subject, particularly in the virtual environment. Whenever possible, I pre-interview people—a “screen test” of sorts—via Zoom so that I can see if they will work well in a virtual environment. Some questions I want to answer during this brief 20-minute video call are:
    1. Is this person lively and engaging?
    2. Do they have good examples and stories to tell?
    3. Does their topic fit into a larger story arc for the panel or event?
    4. Will they need a lot of cueing for answers?
    5. Do they tend to go on too long in their answers? (Cutting off someone in a virtual interview is much more difficult than in a live event—you’ll have to literally interrupt them, which is not ideal, as opposed to using body language in a face-to-face setting).
  2. What Will the Audience See and Hear? Thinking through in advance what the audience will see and hear is critical to making any successful video content, but especially for virtual or livestreamed events. When your audience isn’t captive, they can easily switch the “channel” and consume some other content if yours isn’t compelling. So how can you convey the story and keep them engaged?
    1. Does the interviewee have good lighting, audio and camera setup? If you are not shipping a camera-in-a-box setup or having a local camera operator film the interview, you may need to rely on Skype or Zoom. Someone who looks like they are in the witness protection program will need your help to get their lighting better positioned for their face.  I’m a fan of the Aperture M9 LED, the Fox Fury Rugo, and the Lume Cube Mini as affordable options that you can ship to an interview subject. I’m not a fan of ring lights, by the way, as they do make the “devil eye” look for most people, and don’t work well at all for those with glasses. For audio, I love my Saramonic lavalier. I have the Blink 500 because I can also pair it with my phone for social media recordings (if buying this system, be sure you get the correct version–there are ones for Android or iPhone). The MPOW headset is a decent low-cost choice, if you don’t mind a headset in your shot. Or the Rode smart lav if you prefer a lavalier. Remember that computers and drives have loud fans, so be sure your subject is as far away from them as is practical when you are ready to record.
    2. Does your “talent” have some visuals to share? What format are they in? If a Powerpoint, can you view slides in advance and make suggestions for what will be most engaging? (Often I suggest some top selects, and we can provide the entire deck as a downloadable resource for registered participants afterwards.)
    3. If this is a video interview rather than a panel discussion, will we have access to photos or video clips to intercut into the interview at a later date? Sometimes I will even have the interview talent record a side-angle shot of themselves with their phone for some of our questions and send that to me, so I have an angle to intercut with the primary shot. (Teach your interviewee to use WeTransfer.com or Hightail.com to share large files so they don’t eat up your Dropbox or Box drive space.)
  3. Be Prepared. As an interviewer, the pressure is always on us to be more prepared than the interviewee(s). Most importantly, we need to set the subject at ease, and ensure that they feel they are coming across well. Here are some ways to be sure you are prepared.
    1. Create a flow or outline for the conversation—one that will make sense for the audience and your event theme. Be sure to share it in advance with all panelists, including which questions or themes you are likely to ask which people (which is based on your pre-interview and research homework).
    2. Have at the ready a primary set of questions that follow your flow, but also a secondary set of questions ready to go in case the audience isn’t highly interactive.
    3. Teach less experienced interviewees how to speak directly to their camera, rather than to their screen. This will make an enormous difference in how the audience responds to them. And as interviewer, remember to do the same. I put a sticky note with a smiley face just below my web camera lens as a reminder. (For more tips, here’s a LinkedIn post I wrote about looking better on your next virtual call.)
    4. In a webinar format, be sure you take advantage of the “green room” feature and give panelists a custom link so that they can enter the webinar early, get a chance to chat with each other and with you. You can take this time to review the format and agreed-upon flow or outline, test microphones, adjust lighting, and be sure everyone’s internet connection is stable (turning off notifications—here’s how on a Mac and here’s how for Windows 10, disengaging Dropbox syncing, and disconnecting any VPN). And don’t forget to take a group screenshot for PR purposes!

Moderating virtual panels and conducting interviews in virtual settings can be challenging. But with these strategies, you can make the experience fun, engaging and rewarding for you, your interviewees and your audience.  In a future article, I’ll get into the tech side of remote video recording. I’ll also be doing a post on how to get the audience engaged in a virtual panel discussion, so stay tuned!

Amy DeLouise is a digital media expert and producer/curator/moderator for virtual events.