I’m so honored to have been interviewed on #podaster @frederickvan amazing series This Week in Photo, the world’s most popular photography podcast network! We had a great discussion about creativity, filmmaking, and what it takes to be a multihttps://thisweekinphoto.com/-platform content creative. #podcasts #ageofconversation #contentcreator #storyteller #videoproduction #GALSNGEAR
Transcripts rule. If you are a video content creator like me, you know that getting transcripts of interviews, and even transcribing b-roll audio, can massively speed up the video editing and publishing process. Here’s how.
Faster Video Editing. If you’ve ever scrubbed through footage listening for soundbites, you know it’s time-consuming. Even listening at double speed. It’s much faster to scan through an accurate transcript, then pull your top pick soundbites together into a timeline for final selects.
Making Your Selects. Once you have your interviews in hand, it’s time to log your best takes. Thankfully there are great digital tools to make the transition from field shoot to final edit seamless. In FinalCutPro, you have the Lumberjack system, which lets you live log on your shoot and tag soundbites in the field, and also set up your top soundbites for editing. For those working in Premiere Pro, the Transcriptives plug-in from Digital Anarchy is a great way to go to simplify the soundbite-tagging-to-editing process. And these systems also speed up your captioning and subtitling workflow.
Blogs, Websites and Social Posts. Be sure everyone in your communications department has access to your interview transcripts. Transcripts are great source material for pull quotes that can be sourced for social media posts, blogs, publications and e-newsletters.
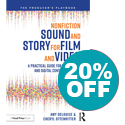
Captioning. Once you have accurate transcripts, captioning is a breeze. You can output your final transcript of a show and upload it directly into a publishing platform such as Vimeo or YouTube. Or you can create your own captioned version. (Processes like Transcriptives captioning workflow makes this extremely simple.) My preference is for the latter. After speaking to many users for the accessibility chapter of my book Nonfiction Sound and Story for Film and Video, I learned that auto-captioning can not only be inaccurate, but also poorly timed. If a caption comes too early, for example, it can give away a story line without letting the viewer draw those conclusions for themselves.
Where to Get a Good Transcript. These days, you can get fast turnarounds on transcripts—often in a matter of hours. For straightforward and brief interviews, I’m a fan of automated services like https://www.rev.com/. For people with accents, those who speak very fast, or lengthy interviews, I prefer the human touch with a service like Noble Transcriptions. Don’t count on the YouTube automated tool. For $1-2/minute, accurate transcripts are your best tool for storytelling.
Amy DeLouise is a video content creator helping organizations tell a better story.
You’ve got some interviews lined up for a company video. Maybe you’ve already got a list of questions. But will you be able to turn those soundbites into a compelling story? Before filming, you may need to do some brief writing. Namely, a short creative brief, conduct some pre-interviews, and develop a story arc. As a professional video scriptwriter and producer, here are a few of my top tips for some writing that will help your video end product.
- Creative Brief. What’s the look and feel you want to convey? Who is your target audience? And what are you trying to get them to feel and do after watching the video? What are the delivery specs and what platforms will it play on? Who has final approvals? What’s the budget and timeline for delivery? Detailing the answers to these questions is essential before you roll on any footage. Often, I like to add storyboards to my creative briefs, so everyone can discuss looks and agree on a visual style. You can use tools like Storyboarder Plot or the more high-powered Frameforge. You can certainly reference other videos on YouTube, but be careful. If you don’t know the budget and timeline of those projects, you could be setting a goal you can’t achieve. And don’t forget that even a crappy sketch can help everyone on the team visualize the look!
- Pre-Interviews. Whenever possible, conduct pre-interviews. If you’ve pre-interviewed someone, you can build rapport in advance of lights-camera-action. You can also get a sense of key stories and anecdotes and how to approach your questions. You’ll also get a sense of their personal style, which will again help you conduct a better interview. A solid story arc drawn from these interviews should include a brief introduction or back story, a key challenge or turning point, and a resolution. And ideally also an opening hook. (I’ll leave that for another post.) By pre-interviewing your subjects and thinking through your story arc in advance, you’ll get better soundbites and avoid missing an important element.
- Story Arc. Now that you’ve got the lay of the land in terms of who your main characters are and the stories they can tell about your subject, you can start to lay out a possible story arc. This doesn’t mean you can’t stray from this idea once you are in the editing room. But a solid story arc can help you decide which questions are most essential when you have limited time for interviews. You can also start to understand what additional visuals you might need to tell the story, whether they are stock images, archival content, or b-roll. For my video projects, I like to have these elements in my story arc:
- An opening hook—something to grab the viewer and get them into the story.
- Background – an extremely brief explanation of what we’re talking about—which can come from interview soundbites or a narrator.
- Central challenge or conflict – every story needs some tension, even nonfiction. What created change in the central character’s life? What did the product do to change the world of the customer?
- Resolution – Some final thoughts or a resolution of the central challenge gets you to the end.
- Call to Action – If you are making a fundraising or advocacy video, there may be something you want viewers to do after watching. “Get involved by clicking this link” etc.
You don’t have to be a Hollywood screenwriter to make your interview-based nonfiction story better. But you will find that doing some writing in advance of filming will improve your video storytelling and impact. In an upcoming post, I’ll talk about taking the story arc plan and transcripts and turning them into an editing script.
For more details on video scripting, see my LinkedIn Learning course http://bit.ly/HowtoScript
You just got invited to moderate a panel. Great! By the way, it’s going to be virtual. Oh dear. As a virtual event moderator, you are the stand-in for the audience. Your engagement throughout the interview or discussion will make a difference in how the audience perceives the experience. And if the recording will include you and your reactions and questions, it’s even more important to consider how you will appear on camera. Here are some tips for making your event more lively and interactive.
- Make sure your face is “alive”—your facial expressions, your engagement directly to camera, and your responses to the speaker are all essential for making the experience feel more personal for the audience. Practice in the mirror or in a private video call with no one but you on the line.
- For livestreamed events, let the audience know at the top of the interview and at regular intervals that you will be taking questions.
- Don’t expect the audience to immediately ask questions when you open the floor, so have a set of relevant questions ready for each panelist.
- Be sure you have a production team member save the Q&A and/or Chat so that any questions not answered live can be followed up by you and/or your interviewee. You can then post these questions and answers through your website and social channels–another way to promote post-event engagement.
- Come up with creative ways to engage the audience and make sure they feel represented, even if their faces do not appear in the livestream or recording. Ask people as they arrive to type in where they are tuning in from, if this is a nationwide or global event. Ask people to share one obstacle or challenge relating to the session topic.
- Promote virtual applause. One fantastic tip I got from my friend Jeff Greenberg who is an experienced virtual trainer, was to come up with a letter that stands in for applause. I usually change the letter depending on the topic. On a recent panel I moderated during the One Woman, One Vote Film Festival, Wonder Women Behind the Lens about visual effects artists and editors, we used the letter “W”. I asked attendees to “throw down a W in the chat pod any time you want to applaud the speakers or support what they are saying.” We had a lively discussion with lots of “WWWWWWW”’s in our chat that helped our panelists know there was an audience cheering them on.
Keeping an audience lively and engaged when you can’t be with them in person is a big challenge. That’s why being a virtual panel moderator is much more like being a television host or MC than it is like moderating a live panel. But with some advance planning and these tips, you’ll increase your audience engagement.
Amy DeLouise is a digital media expert, and virtual panel curator and moderator.
CONTACT
Email: amy@amydelouise.com
Phone: (301) 933-9200
CAGE code 4KV79
SIC/NAICS codes 512110, 541613, 611430
Privacy Policy
Thanks for filling out a form. We will use your information to process your request for information. We may also register you to receive our occasional newsletters, and/or contact you about our services and products. Thanks!
Recent Posts
- Saying No to Say Yes: A Lesson in Women’s EmpowermentMarch 1, 2023 - 8:25 am
- Feeling ThankfulNovember 16, 2022 - 6:04 pm
- How to Conference: Live Events NetworkingOctober 16, 2022 - 11:16 am


