Hacking Video in 10 Essential Steps
 So you want to make a video for your company or nonprofit. You may want to capture a particular event or person on camera. But what’s next? Actually, a lot comes first, before the shoot ever happens. Let’s break it down into all the steps that go into production. Then you can decide which parts you want to manage yourself. And you’ll understand the workflow if you decide you want to team up with a Producer or Production Company to help you.
Step 1. Define the Goal. Wasn’t it Yogi Berra who famously said “if you don’t know where you’re going, you probably won’t get there”? So knowing what you want to shoot is great, but if you don’t know WHY, and what kind of outcome you want for your production, you might miss your mark. Do people need to learn a key skill from this video? Do they need to get motivated to take action on a social or political cause? Do they need to feel good about their new company? Buy something? Attend your big event? Knowing your goal here is essential to how you design the video, but also how you measure success afterwards.
Step 2. Define the Audience. Success will rely partly on knowing your target audience. And please don’t say “everyone.” Have you noticed how many cable channels there are? And how about YouTube channels? We don’t live in a one size fits all world. Take advantage of that, and determine who you want to reach—age, demographics, viewing habits, and what information they bring to your subject matter. You might end up shooting 3 different versions of your show for those different audience segments.
Step 3. Consider the Viewing Environment. Are folks going to watch this video on their laptops? In a busy office environment? At a training session? At a purchase counter? On a noisy trade show floor? Gathered together with thousands of other activists for your cause? The viewing environment—the “envelope” as I like to call it—matters a lot. It helps determine length, emotional content, style, sound design, and many other factors. In addition to thinking about where people will view your video, this step is vital in determining your output specs. And output specs will influence your shooting specs. If I know something needs to be very high quality, on a big screen, I might shoot it in 4K or higher. If it could air on broadcast, we need to shoot interlace. If it will never be seen on anything other than the web, I might acquire footage in 1080p. All of these decisions need to be made up front by you, typically with the Director and Producer, in consultation with the Editor.
Step 4. Hire the Production Team. Pulling together the right team—for writing, directing, shooting, sound, editing, graphics design, sound design—is a key step. You might decide to do all of this coordination and management work yourself, or hire and direct a crew and editor you’ve worked with before. Or you may hire a Video Producer. She has a rolodex of folks she’s worked with, or perhaps a production company, who work as a team every day.
Step 5. Define Creative Concept and Budget. OK, Now that you know Why, Who and Where, you can start thinking about How and How Much. How will you best connect with this audience? Does this need to be fast-paced? Funny? Dramatic? Documentary style? Will the end product need to be less than 90 seconds long, for web viewing? Can it be longer–more like a brief news package (2-3 mins)—for group viewing? You’ll want to develop a creative treatment and maybe a few storyboards, so you have a sense of how things will look, and how much they will cost. You’ll also need these documents for internal approvals before moving forward with production. Here’s where a Scriptwriter and Creative Director can be helpful to your project. They have loads of experience developing concepts that are creative, but also achievable. Cost drivers will include schedule (is this a rush project?), how many shooting and editing days, and complexity of the concept.
So how about cost? People used to define video budgets in terms of “cost per finished minute.” I think it’s more useful to consider cost-per-impression. If your video costs $10,000 and reaches 20,000 people live and online, that’s 50 cents per impression. If those people go out and raise $4 million for your cause because the video helped inspire them, that’s a pretty cost-effective outcome. If your video costs $40,000 and reaches 2,500 people worldwide in online training sessions, that’s a cost of $16 per person. If you would normally spend $150 per person to send trainers to multiple locations, then you have saved yourself a bundle. So you need to know from Step 1 what the goal is, and whether this cost is justified. There is also a direct relationship between cost and quality, there’s no getting around that. Some situations do not merit a full-scale production. You may be able to get away with recording someone with an iPhone. That’s another cost-benefit analysis you need to make when weighing your options.
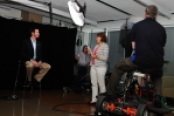
Step 6. Plan the Shoot. The shoot takes 10% of the time spent a given production, but it’s the part everyone thinks about most. Typically, the Director will work with the Producer and the Writer to develop a shot list. These could be very scripted scenes, or more documentary style “we hope to get this” kind of scenes. If it’s the latter type of shoot, be aware that you won’t get everything you dreamed of. But you might get some cool stuff you didn’t even imagine. If you think you might need footage for multiple platforms or purposes, it’s a good idea to bake this into your shoot plan and schedule. It will take more time and money, but save substantially on the back end.
Step 7. Tag and Digitize Footage. This step is usually done by the Producer with the Editor. It’s a time-consuming but vital process for reviewing, prioritizing and organizing all your content–footage, photographs, logos, audio, music–in a digital Nonlinear Editing System so that you can use it now and in the future. Make sure the tags are something that would make sense to someone not intimately involved in the project. So don’t label a shot “MS w JJ.” Label it “Marilyn Smith CEO _ Jarvis Jackson CFO”.
Step 8. Editing. Footage editing typically goes through several rounds. The first round—the rough-cut—might be done with only temporary or “scratch” VO and music. Later rounds will include professionally recorded voiceover, if that’s the style of piece you’ve planned, plus music that the Producer needs to license for your specific usage. Even stock music has a license, and YouTube will pull your video down if you can’t demonstrate that you have it. I tend to go through about 4 rounds of edit drafts: a rough cut for only internal folks to comment on, a finer rough cut for their bosses or decision makers to comment on, and then two rounds of final refinements for graphics, audio, narration and music. A sub-step of editing is graphics—whether simple text or more complex animation. If you have a million shots from various sources, you’re also going to need a color-correction step so it looks like a unified piece. The same goes for audio—an audio mixing session will help even out interviews or other audio from multiple sources.
Step 9. Compressions. In the world we live in, there are many platforms and many output specs. Hopefully you already figured out what you needed in Step 3. My clients usually need several different compressions for projects—one version for Vimeo, another for YouTube, and another for a live event projection system.
Step 10. Future Proofing. Be sure you archive all your edit media—you’d be surprised how often you’ll need to go back for shots and use them in another production. Back up your project files. And be sure you also output one master file, at the highest possible resolution such as ProRes 4444, as well as a version with separated audio tracks, so that you can always go back in and reversion as needed in the future.


Leave a Reply
Want to join the discussion?Feel free to contribute!